 |
THE 3DWAXMILLER CLUB.
A place to share your experiences with your 3dwaxmill system. 3D Wax Mill
|
| View previous topic :: View next topic |
| Author |
Message |
Curt

Joined: 22 Nov 2005
Posts: 39
Location: Chesapeake, VA.
|
 Posted: Sat Dec 31, 2005 2:08 pm Post subject: A couple I've tried. Posted: Sat Dec 31, 2005 2:08 pm Post subject: A couple I've tried. |
 |
|
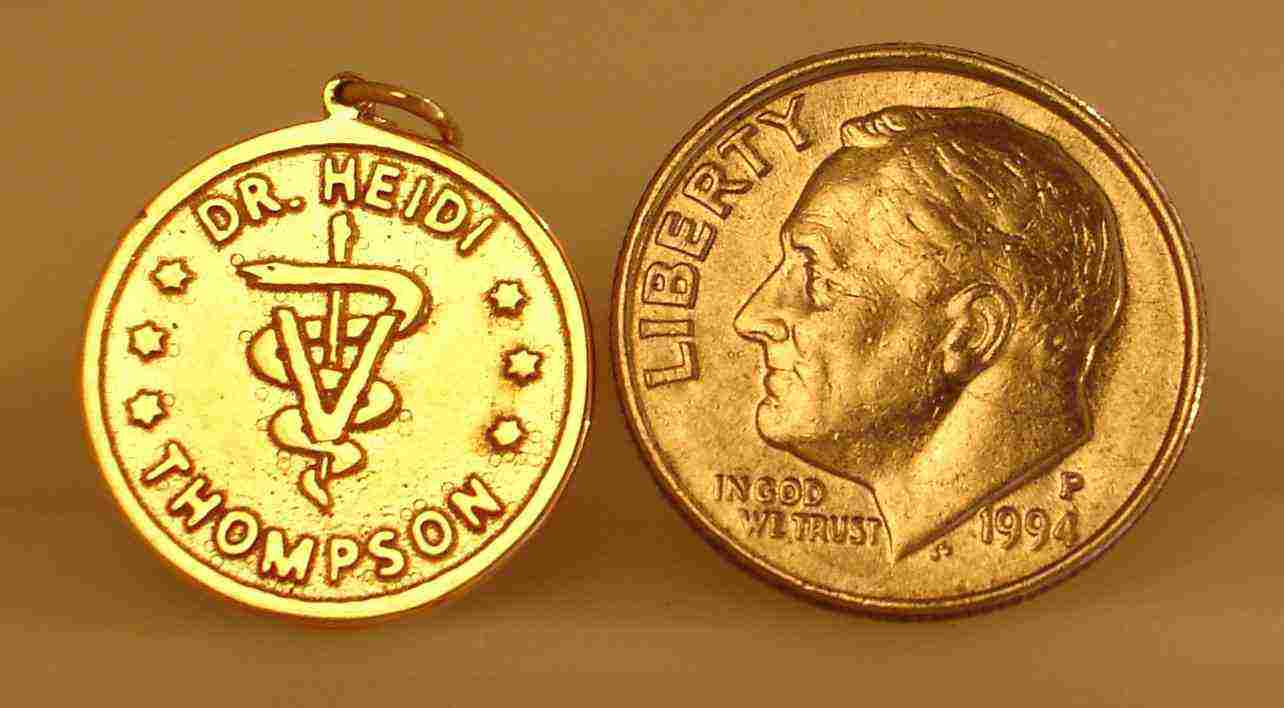
The vetDr1.jpeg is one of my projects, I think it turned out good 
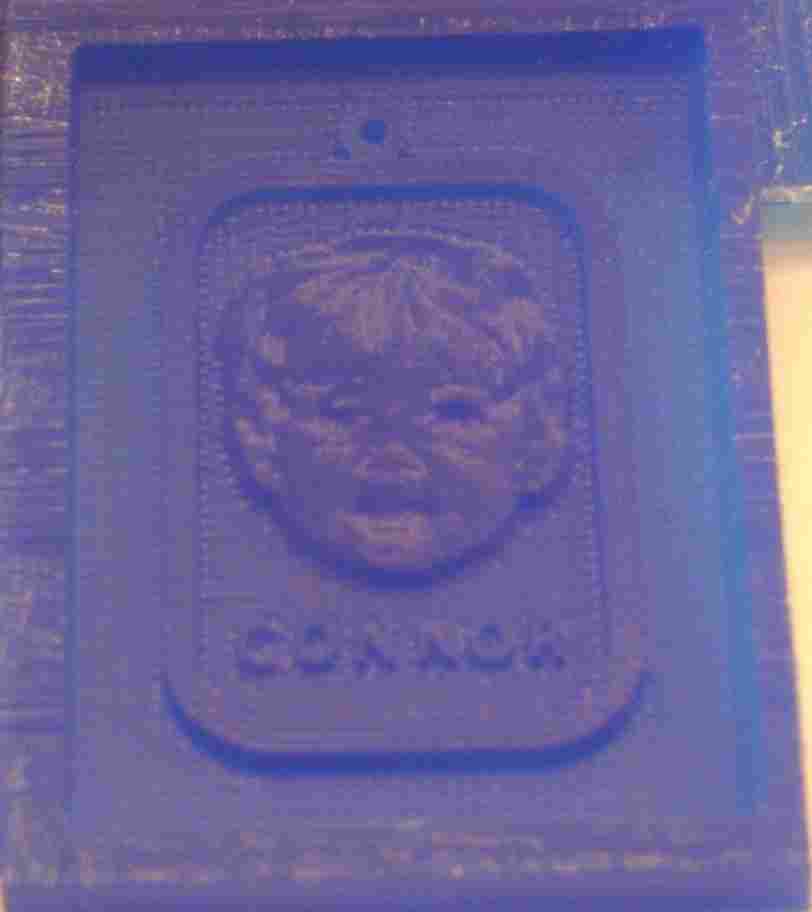
The GdKid1.jpeg is one of my grandson, used him as the model,, poor boy!!
It's 20 x 13 mm.
Sorry for the lack of shots, have done many, but bad camera and lighting.
Pick em to death guys. I need the input.
Curt
| Description: |
|
| Filesize: |
46.26 KB |
| Viewed: |
12027 Time(s) |
|
| Description: |
|
| Filesize: |
9.78 KB |
| Viewed: |
12027 Time(s) |
|
|
|
| Back to top |
|
 |
Jwlrymkr
Joined: 30 May 2004
Posts: 851
Location: Waco, Texas
|
| Posted: Sat Dec 31, 2005 7:03 pm Post subject: |
|
|
Curt, Glad to see you getting your feet wet too!
Looks great! The detail is superb.
Keep up the great work,
Ken
|
|
| Back to top |
|
|
McCay
Joined: 03 Aug 2004
Posts: 342
Location: Greenville, SC (upstate)
|
| Posted: Sun Jan 01, 2006 9:14 pm Post subject: |
|
|
Good work. Looks like you got some pretty good detail with the photo of your grandson.
Keep it up,
McCay
|
|
| Back to top |
|
|
Colin Creed
Senior Miller

Joined: 20 Jul 2004
Posts: 820
Location: Berwick, Victoria, Australia
|
| Posted: Sun Jan 01, 2006 11:50 pm Post subject: |
|
|
Hi Curt,
Both look pretty good, Well done!!
Question: Was all of the vetDr1 raised from a BMP or did you create it?
regards Colin
|
|
| Back to top |
|
|
Curt
Joined: 22 Nov 2005
Posts: 39
Location: Chesapeake, VA.
|
| Posted: Mon Jan 02, 2006 7:56 am Post subject: |
|
|
Hi Colin,
The vet symbol was a bit map, the rest I put in from 3de.
Every thing was raised .5.
Now to everyone, in the vetDr1 pic, I'm noticing tooling marks,, the little round circles you see, What is it, an how do I stop it.
Thanks guys
Curt
|
|
| Back to top |
|
|
p schmidt

Joined: 07 Apr 2004
Posts: 1314
Location: AURORA ,ILL. PHONE 630 552-9101
|
| Posted: Mon Jan 02, 2006 10:33 am Post subject: tool path |
|
|
I too noticed the small circles did you let the mill complete it's course? I know that sometimes I would look at the progress on a piece and stop the mill thinking it was "done enough" only to find out it still had one more final pass that would have removed all small blemishes..
also check your tool path and tool size which ones did you use?
did you preview the finished piece in virtual mod. and did it show the circles if it did try a different tool path and see how it looks(in vir.mod)you can also
check the cutting times of the different tool paths in virtual mod. you'll be surprized at the differences.
just my thoughts
|
|
| Back to top |
|
|
jeff dunnington
Site Admin

Joined: 24 Feb 2004
Posts: 1586
Location: Houston, Tx
|
| Posted: Mon Jan 02, 2006 12:05 pm Post subject: |
|
|
Curt
Happy New Year!!
Sorry for not responding sooner.
Please post the path directions and parameters that you used for the 2 projects (both draft and finish). Sometimes I have experienced my JWX-10 making the dimples when the speeds were high.
There is also new firmware for the JWX-10 that you should load. I have posted it and the instructions in the 10 and 40 forum.
_________________
Jeff Dunnington
http://www.3dwaxmill.com
http://www.dreamgold.com |
|
| Back to top |
|
|
Curt
Joined: 22 Nov 2005
Posts: 39
Location: Chesapeake, VA.
|
| Posted: Mon Jan 02, 2006 2:10 pm Post subject: |
|
|
Jeff,
Here's the settings:
Rough1: .040 bit, your stock settings
Rough2: .020 bit, your stock settings
Finish1: .010 bit, your stock settings
Finish2: .003 pryamid, using the settings for your .005
I've noticed if I do it in those orders I get a more rounded look to the faces.
Have tried different steps, they come out good, detail is there, but have a flat look.
Also have found a few short cuts in photoshop that you may like, less steps, and as you can see from the wax, about the same out come.
Hope that helps alittle
Curt
|
|
| Back to top |
|
|
Colin Creed
Senior Miller
Joined: 20 Jul 2004
Posts: 820
Location: Berwick, Victoria, Australia
|
| Posted: Mon Jan 02, 2006 2:32 pm Post subject: Dimple marks |
|
|
Hi Curt,
I wasn't sure if the small round marks were a BMP texture that was supposed to be there?
Obviously they're not!
Sorry, I can't help much with JWX problems.
That was why I asked if the design was raised from a BMP file.
Sometimes when I've used a BMP file, I've had small loose pixels that haven't shown up in the 3D Engrave render.
I now make it a point of outputting a DXF file, just for viewing it in MP4.
The reason is that MP4's render is much better & you can easily see any odd ball spots that aren't meant to be there.
I then open the BMP file in one of the photo editing programs & clean up the loose pixels.
I don't use 3D Engraves BMP editing as it doesn't seem to do as good a job & the image seems to loose clarity.
Then I re-import the BMP into 3D Engrave & try it out again.
regards Colin
|
|
| Back to top |
|
|
Curt
Joined: 22 Nov 2005
Posts: 39
Location: Chesapeake, VA.
|
| Posted: Mon Jan 02, 2006 5:33 pm Post subject: |
|
|
Colin,
Can help with the dimples from bmp files.
Open your pic file, save as a transparent gif,, erase all you don't want. Make a new file the same size as your working file, fill it black. Copy and paste your working file to the black one. Save as anything you want it to be,, jpg, bmp, etc. Then you won't have an stray artifacts bleeding into your black background.
Curt 
|
|
| Back to top |
|
|
Colin Creed
Senior Miller
Joined: 20 Jul 2004
Posts: 820
Location: Berwick, Victoria, Australia
|
| Posted: Sat Jan 07, 2006 6:47 am Post subject: Very clever |
|
|
Hi Curt,
Very clever BMP editing tip, I'll certainly give it a try. 
Thanks, Colin
|
|
| Back to top |
|
|
|
|
You cannot post new topics in this forum
You cannot reply to topics in this forum
You cannot edit your posts in this forum
You cannot delete your posts in this forum
You cannot vote in polls in this forum
You cannot attach files in this forum
You can download files in this forum
|
Powered by phpBB © 2001, 2005 phpBB Group
|

